






10 Injection Mold Tooling Tips for Global Buyers

Global sourcing can widen your options, but it also makes tooling decisions harder to verify. A polished quotation cannot reveal every risk. The mold still has to fit your resin, press, production volume, and quality requirements. Details matter: cooling channels, steel selection, venting, and spare inserts can affect cycle time and maintenance. Small omissions become expensive later.

Injection molding consultant John Bozzelli is known for emphasizing process understanding. A concise paraphrase of that principle—not a verbatim quotation—is: “A reliable mold begins with a process the team understands.” That idea is useful for buyers comparing suppliers across regions. Ask how each tool will be sampled, measured, maintained, and supported after shipment. Request clear drawings, agreed acceptance criteria, and records from mold trials. Good answers should be specific, not simply reassuring.

This guide presents 10 injection mold tooling tips for global buyers, from design reviews to supplier communication and shipment planning. It focuses on practical checks you can apply before approving a tool. A sample part may look right and still reveal uneven cooling or difficult ejection during a longer run. That happens. Buyers should leave room for adjustment, document decisions, and ask what remains uncertain. No checklist removes every risk. Careful questions make surprises easier to manage.
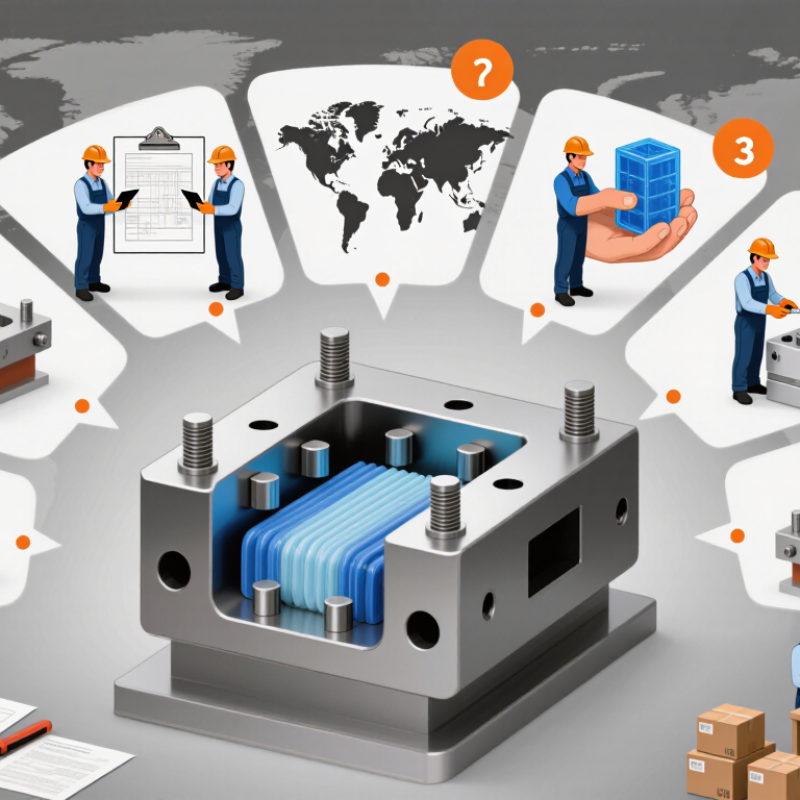
10 Injection Mold Tooling Tips for Global Buyers

Understanding Injection Mold Tooling and Its Role in Production

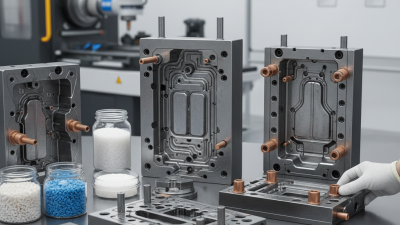
Injection mold tooling is the equipment that shapes molten plastic into repeatable parts. It includes the mold base, cavity, core, cooling channels, and ejector system. Each feature affects part quality and production speed. Small decisions matter.

For example, a cooling channel placed far from a thick rib may leave that area hot. The part can warp or take longer to cool. Ejector pins also need careful placement; marks on a visible surface may be unacceptable.

A tooling review should check part geometry, material shrinkage, draft angles, and the intended production volume. These details help buyers compare quotations beyond the initial tool price.

Tool design involves trade-offs. A multi-cavity mold can produce more parts per cycle, but it may cost more and require tighter process control. A simpler tool may suit lower volumes, though cycle times could be longer.

Ask for drawings, steel specifications, and a plan for sampling and dimensional checks. It is easy to over-specify a mold before demand is clear. That can tie up budget unnecessarily.

Early sample runs may still reveal issues that drawings missed, so leave room for measured adjustments.

Defining Part Requirements and Mold Specifications

Before requesting mold quotations, define the part’s real operating conditions. Specify the resin grade, expected annual volume, critical dimensions, cosmetic surfaces, and assembly interfaces. A nominal wall thickness of 2.5 millimeters means little without knowing whether the part has ribs, long flow paths, or visible sink marks. Mark the dimensions that truly affect function; applying tight tolerances everywhere can raise tooling and inspection costs without improving performance. A neat CAD file is not enough.

The scale makes clear specifications important. Grand View Research valued the global injection-molded plastics market at USD 284.7 billion in 2023 and projected 4.8% annual growth through 2030. PlasticsEurope reported global plastics production of 413.8 million tonnes in 2023. These figures cover broad markets, not mold demand, but they show how many material and production conditions buyers may encounter. State the resin’s shrinkage basis, texture or polish requirement, gate location constraints, and required tool life. Also define who approves sample parts and how dimensional results will be recorded. ISO 20457 provides a framework for tolerances on molded plastic parts, but the drawing must still identify the features that matter. Small omission. A hidden undercut or unclear datum can trigger redesign; review the parting line and ejection marks with the molder before steel is cut. The specification may still need revision after first trials. That is normal.

Evaluating Global Toolmakers and Their Capabilities

A capable toolmaker should explain its process with evidence, not polished sales language. Ask for recent mold-flow analysis, steel certificates, machining tolerances, and a sample inspection report. Check whether the report identifies cavity numbers and measurement points. A beautifully finished sample can still hide uneven cooling or inconsistent dimensions. Ask to see the tool’s maintenance history, too. Numbers can mislead.

Automation is useful context, not a substitute for tooling expertise. The International Federation of Robotics reported 4.28 million industrial robots operating worldwide in 2023, a 10% increase over 2022, in World Robotics 2024. That figure describes factory automation, not mold quality. Ask whether the toolmaker can integrate with your intended press, robot, and inspection process. Request a witnessed trial using agreed resin, cycle settings, and acceptance criteria. Ask for proof. Compare the trial record with the quotation, including promised cycle time and annual volume. Check who owns design changes, spare inserts, and repair documentation across time zones. One gap in this checklist: a strong audit cannot predict every production problem. A small pilot order can reveal issues that a factory tour misses.

Comparing Tooling Costs, Quality Standards, and Lead Times

When comparing injection mold tooling, look beyond the quoted price. A low initial cost may exclude texture, spare inserts, or mold-flow analysis. Request an itemized quote covering steel grade, cavity count, hot-runner components, sampling, and maintenance. A two-cavity tool may cost more upfront, yet lower unit costs when demand is steady. Confirm the quote’s assumptions.

Tip: Ask for a schedule with clear checkpoints. A project may include design review, tool build, first trial, and revisions. Each revision can add days or weeks, especially after steel cutting. Compare lead times from drawing approval to accepted samples, not just tool completion. Allow time for shipping, too.

Quality needs measurable checks. Specify critical dimensions, surface finish, and inspection methods before production. For example, agree whether a thin snap feature is checked with a gauge or a coordinate-measuring machine. Request trial-shot reports and photos of the mold base, cooling lines, and parting line. Requirements vary by application; verify what matters for your product instead of assuming every supplier follows the same checklist. This is easy to miss. A lower-cost tool may still suit the job, but document its maintenance plan and expected shot life.

10 Injection Mold Tooling Tips for Global Buyers - Comparing Tooling Costs, Quality Standards, and Lead Times

Planning guide: indicative tooling budgets and schedules below are broad USD ranges for early comparison, not quotations. Actual costs and lead times depend on part geometry, resin, mold size, cavity count, steel, automation, validation scope, and supplier capacity. Shipping, duties, and taxes are excluded.

# Buyer tip Cost comparison Quality and specification check Typical lead-time planning What to request from the supplier
1 Define the production volume before choosing the mold. Prototype or bridge tooling may cost roughly $3,000–$15,000; production tooling often starts around $8,000–$40,000 for a simpler single-cavity mold and can exceed $150,000 for complex, multi-cavity projects. Compare expected mold life, maintenance needs, and total cost per part—not only the initial tool price. Ask how cycle-life estimates are determined. Prototype tools commonly take about 2–6 weeks; production molds often take 6–12 weeks or longer. Costed options for prototype, single-cavity, and multi-cavity tooling, with stated assumptions and estimated cycle life.
2 Confirm the resin and material grade early. Material changes can affect tool steel, venting, cooling, shrinkage compensation, and surface finish, potentially increasing rework and tooling cost. Specify the resin grade, color, additives, and any required material test documentation. Do not treat different grades of the same polymer as automatically interchangeable. Allow extra time if the resin or grade is not finalized before mold design approval. A mold-flow or shrinkage basis, the resin supplier’s processing data, and confirmation of the exact production material.
3 Agree on measurable part requirements. Very tight tolerances, complex shutoffs, and difficult-to-measure features can increase machining, inspection, and correction costs. Identify critical dimensions and acceptance methods on the drawing. ISO 20457 may be used as a reference for tolerances of plastics moulded parts where appropriate; project-specific requirements still need agreement. Detailed, approved drawings before tool design help avoid review delays and late corrections. A dimensioned 2D drawing, 3D model, tolerance notes, and an inspection plan identifying critical features.
4 Choose the cavity count based on demand and process stability. More cavities usually increase the initial tool investment, but may reduce piece cost at sufficiently high and stable volumes. A family mold can be economical only when part demand and process requirements suit it. Ask how cavity balance, filling, cooling, and part-to-part variation will be checked. Confirm whether all cavities must meet the same acceptance criteria. Multi-cavity tools often need more design, machining, and sampling time than comparable single-cavity tools. A production-volume forecast, cavity layout, estimated cycle time, and sample inspection results by cavity.
5 Specify tool steel and expected maintenance. Higher-grade or corrosion-resistant steels can increase upfront cost but may be appropriate for abrasive, corrosive, or high-volume applications. Specify steel grade, hardness where relevant, corrosion protection, and which components are replaceable. Steel selection should match resin, output, and maintenance conditions. Special steel availability or heat treatment can affect the schedule; request confirmation at quotation stage. A mold bill of materials, steel certificates where required, maintenance schedule, and spare-parts list.
6 Review gate, runner, and cooling design. Hot runners and conformal or more complex cooling can raise tooling cost; they may improve material use or cycle time in suitable applications. Check gate location, vestige limits, weld-line risks, cooling uniformity, and the planned method for evaluating process stability. Complex hot-runner systems and design changes can add review and commissioning time. A mold layout, cooling-channel plan, gate proposal, and a clear list of any externally sourced components.
7 Agree on surface finish using samples or measurable references. Polishing, texture, and cosmetic standards can add labor and may require rework if expectations are subjective or approved late. Specify finish by drawing callout, approved physical sample, or agreed texture reference. Define acceptable limits for flash, sink, flow marks, and weld lines. Cosmetic approval can extend sampling if appearance requirements are not agreed before the first trial. Finish samples, a defect-limit standard, and written approval criteria for visible surfaces.
8 Make sampling and validation part of the purchase plan. Trial shots, dimensional inspection, and corrective iterations add cost, but can reduce the risk of production disputes and expensive late changes. Define sample quantities, dimensional reporting, material traceability, and required functional tests. ISO 9001 concerns a quality-management system; it does not by itself certify a mold or guarantee part quality. Reserve time for mold trials, report review, and at least one correction cycle when the design or process is new. A trial plan, sample approval form, measurement report, and a record of changes after each trial.
9 Clarify mold ownership, access, and transfer terms. Ownership, storage, maintenance, and transfer arrangements may affect the quoted price and future relocation costs. Document tool identification, ownership, storage conditions, maintenance responsibility, and access to design and inspection records. Allow additional time for export packing, documentation, customs clearance, and commissioning if the tool will move between countries. Written ownership and transfer terms, tool photographs, maintenance records, and a list of included drawings and components.
10 Compare landed cost and schedule risk, not just the factory quote. Compare the tool price alongside freight, insurance, duties, local modifications, spare parts, and the expected cost of production downtime. Confirm the tool’s intended press requirements, local power and interface needs, and whether local trial or service support is available. Use a schedule with milestones for design approval, steel ordering, machining, first trial, correction, final acceptance, and shipment. An itemized quotation, milestone schedule, named approval points, and a contingency plan for delays or failed acceptance tests.

Managing Mold Trials, Shipping, and Long-Term Maintenance

A mold trial should answer specific questions, not merely produce acceptable parts. Record the resin grade, machine settings, cycle time, and measured part dimensions for each run. Keep sample parts and label them with the trial date and cavity number. Check flash, short shots, and ejection marks under consistent lighting. A small change in cooling time can affect both dimensions and cycle stability. Small details matter. If a result looks borderline, repeat the run before approving the tool. It takes time, but one trial can miss a problem.

Before shipping, clean and dry the mold, then protect exposed steel with a suitable rust-preventive coating. Secure moving components and close the mold with the correct shipping restraint. Photograph the tool from several angles, including its identification plate and connection points. Pack spare fittings, a maintenance record, and clear lifting instructions with the shipment. Things get missed. Verify the crate’s dimensions and weight against the carrier’s requirements, and use moisture protection when transit conditions are uncertain.

Long-term maintenance works best when it follows actual production cycles and observed wear. Track shot counts, water leaks, vent buildup, and any changes in ejection force. Clean vents and parting surfaces with methods suitable for the mold material; aggressive tools can damage precision areas. Inspect guide pins, seals, and cooling channels during planned service stops. Set inspection intervals from supplier guidance and production history, then adjust them when evidence supports a change. Records are not always complete, so note uncertainties rather than treating estimates as facts.